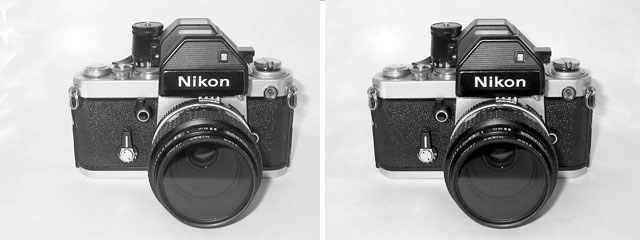
You now have a stereo pair like the images below. If you strain your eyes and look at one with each eye, you can see a full stereo image. I don't encourage you to do this, as deliberately misconverging your eyes may not be a very good idea.
You need to eventually end up with these images being color channels in an RGB image. The first step in this process is to convert the images to grayscale. Next, you need to crop and align them. To do this, first copy one image (I always use the left-eye image for this) and paste it onto the other, as a separate layer (Photoshop does this automatically). Next, set the pasted image to be semi-transparent, so you can see the other image through it.
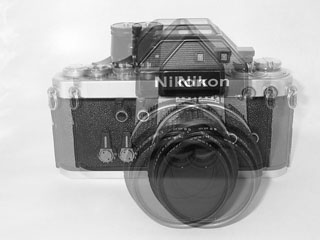 You
should now be looking at something like this. If you made a stereo image by
just pasting the original images together as red and green channels in a color
image, this is what your poor eyes would have to cope with. The next step fixes
this up. Align the images by sliding the top layer (the pasted left-eye image)
until some important details visible in the two layers are perfectly aligned.
These details will appear to lie at the level of the monitor or paper surface
in the final image. I usually go for lettering around the lens when doing camera
photos; if you are doing animals the obvious thing to use would be the eyes.
You
should now be looking at something like this. If you made a stereo image by
just pasting the original images together as red and green channels in a color
image, this is what your poor eyes would have to cope with. The next step fixes
this up. Align the images by sliding the top layer (the pasted left-eye image)
until some important details visible in the two layers are perfectly aligned.
These details will appear to lie at the level of the monitor or paper surface
in the final image. I usually go for lettering around the lens when doing camera
photos; if you are doing animals the obvious thing to use would be the eyes.
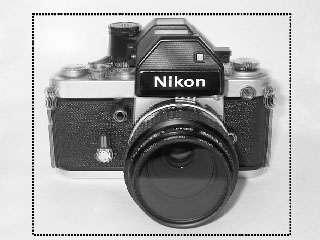 In this case, I lined up the white "Nikon" lettering on the prism.
The next stage is to select the part of the image that will make up the final
stereo picture. Make sure that the part you select does not include any areas
that are missing from either of the original pair, as this will mean that the
next step does not work right. The broken lines in this picture represent a
selection box drawn around the camera after the images were aligned.
In this case, I lined up the white "Nikon" lettering on the prism.
The next stage is to select the part of the image that will make up the final
stereo picture. Make sure that the part you select does not include any areas
that are missing from either of the original pair, as this will mean that the
next step does not work right. The broken lines in this picture represent a
selection box drawn around the camera after the images were aligned.
In Photoshop, once you have selected an area of the 2-layer image, you can
just copy the top layer, use file, new to create a blank image, paste the image
in, and use layer, flatten image to finish the pasting into a single grayscale
left-eye image that will be aligned properly with the right-eye image you are
about to make. To make the right-eye image, select the background layer, use
edit, copy to copy it, file, new to create a new image, paste the image in,
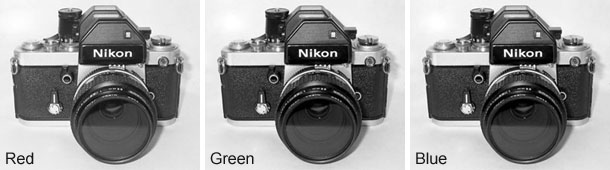
and flatten it. You will need to make a second copy of this image, as you need
three grayscale images to combine into the final RGB color 3d image. The three
separate iamges are shown below, labeled with the colors they will be assigned
when they are combined in the final RGB image. If you look carefully, you can
seen that the red image was taken from a point slightly to the left of the green
and blue images, which are identical.
Finally, use whatever technique your image editor requires to combine the three images into a single RGB image. In Photoshop, you just use the merge command from the Channels palette, and tell the program to make an RGB image, using the correct grayscale images for the red, green, and blue channels. Other programs will use other commands, but most good ones should be able to do this.
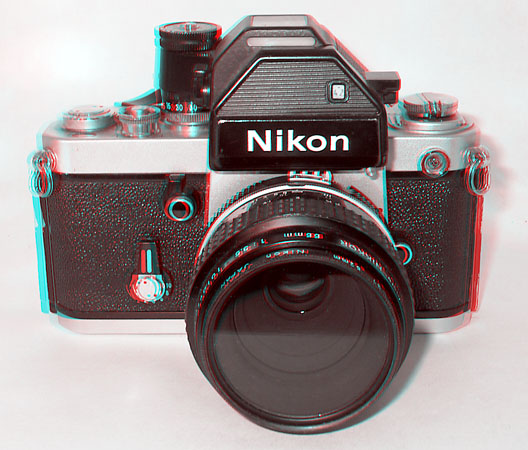 After
merging the channels, you end up with the final image, which gives a good illusion
of three dimensionality when viewed with a red filter for the left eye and a
green or blue (either, since the right-eye image is used for both green and
blue channels) filter for the right eye. To see the large version again, click
on the small image.
After
merging the channels, you end up with the final image, which gives a good illusion
of three dimensionality when viewed with a red filter for the left eye and a
green or blue (either, since the right-eye image is used for both green and
blue channels) filter for the right eye. To see the large version again, click
on the small image.
All of this may seem like a lot of work, but with some practice, and the use
of macros or actions, it can be quite fast and easy. I use three actions in
Photoshop that make the whole process quite fast and painless.
return to first "how-to stereo" page
return to photographic homepage
All images and text on this site are copyrighted by Ross A. Alford and may not be reproduced without permission